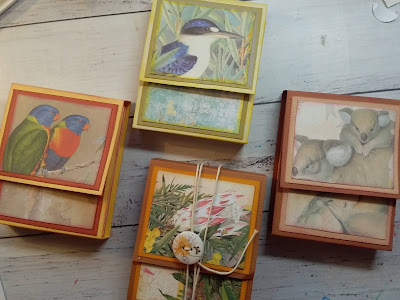
Little Book of Rooms -Songs about Rainbows.
A Little Book of Rooms
This is a gorgeous little project that was inspired by Kaye Williamson from one of her projects on her blog from 2016. They look so cute and would make a wonderful gift for a friend or for someone who is feeling down. You can add an affirmation to the inside of the rooms or a positive saying or quote to brighten up a persons day. I think they are so gorgeous.
To start making your Little Book of Rooms, you will need two pieces of chipboard that measure 2inches by 2inches. These will be covered and used as the cover for your book. You will need to cut two papers to cover this chipboard at 2 3/4inches by 2 3/4inches.
You will also need four papers that measure 4inches by 4inches, these will be your pages. I am using the patterned papers from the Magical Forest 24 sheet paper pad by Crate Paper.
To cover the chipboard for the outer covers of the book, I used double-sided tape. Then placed the chipboard 2 inche squares in the center of the patterned paper. I mitred the corners and folded the flap sides over all edges. The covers are now finished, put them to the side and now we do the pages.
Using the 4in by 4in squares, fold in half, open, and rotate to fold in half in the other direction. This will give you four smaller folded squares. Your page will look like this below.
Now, in one of the smaller folded squares, you need to pinch together to sides that will make a triangle shape fold in the center of the square.
(You may like to watch the video at the end of this blog to understand this part of the process).
It is actually a very easy process but a little hard to explain fully.
After you have made the triangle fold in one of the squares, you need to cut on the fold mark above the triangle fold. Then in the square diagonally across from the triangle fold, you will need to cut about a half an inch flap as in the picture below. This is what you will end up with. Place glue on the front of the flap and then glue it to the back of the ajoining square.
This is what your page will look like when you have glued it to the back.
Your page has been made. You can fold it back up and use your bone folder to press the folds down firmer.
This is the front view of your page below.
You will need to do this with all four of your papers.
The next step, fold your pages up, making sure each page is right way up. The point of the triangle fold needs to be facing to the top. You then glue each page together side by side, by placing each folded page on top of the next page.
Then place glue on the inside covers and glue to the outer facing pages front and back.
The picture below shows all pages glued together, with the covers on and then opened to show each individual room.
When folded up, the triangle fold moves upward and the point is near the top of each page. As show below...
When the glue has dried you can decorate each page with a sentiment, saying, positive quote...something that will brighten your day. I used the stickers from the Magical Forest Sticker sheets, stickers from the Bo Bunny Clear Stickers, the stickers from Doodlebug DesignTeensy Type and also the saying stamps from the Lost Neverland Die & Stamp Set from Echo Park. All these stickers and the stamp sayings were a good size to fit on the little pages.
Using the stamp set, I stamped each saying on to some photocopy paper with a black stazon and then cut round them and then they were glued on to a page in the book of rooms.
On the front cover of each of the Little Books, I painted a selection of the flourishes Beauty from Kaisercraft, with the Dina Wakley Acrylic paints. I gave them a coat of Dimensional Magic to give each piece a shine. They looked so pretty.
I glued the decorative flourishes to the front of each book. These wooden flourishes are not that thick, so you are still able to open the Little Book of Rooms with great ease to show off your decorated rooms.
This is a rather easy process, when you get the hang of folding the triangle in the page and I think they look fabulous when opened out completely.
Below are some pictures of my decorated rooms.
You may like to watch my process video below. It may give you a clearer picture of really how easy these are to put together...
Hope you will make some of these yourself and spread the positive love around.
Have a great day!
Wendy xox


Comments
Post a Comment