Hello Everyone,
Time to get 'wacky' with a hand drawn paper art doll using left over scraps from the Photo Play papers.
What you will need:
*scrap papers from Photo Play
*white scrap cardboard (for lips)
*double sided tape
*glue stick or wet glue
*a black and white marker
*WOW embossing powder-Primary Red
*Distress Embossing Ink
*threads for hair
*button for belt buckle
*your choice of paints (for journal page)
*paint brayer (optional)
*hole punch for hair
To start you need to design your art doll on some paper. You can make it as 'wacky' as you like, the 'wackier' the better. Below is my sketch of the art doll I will be using.
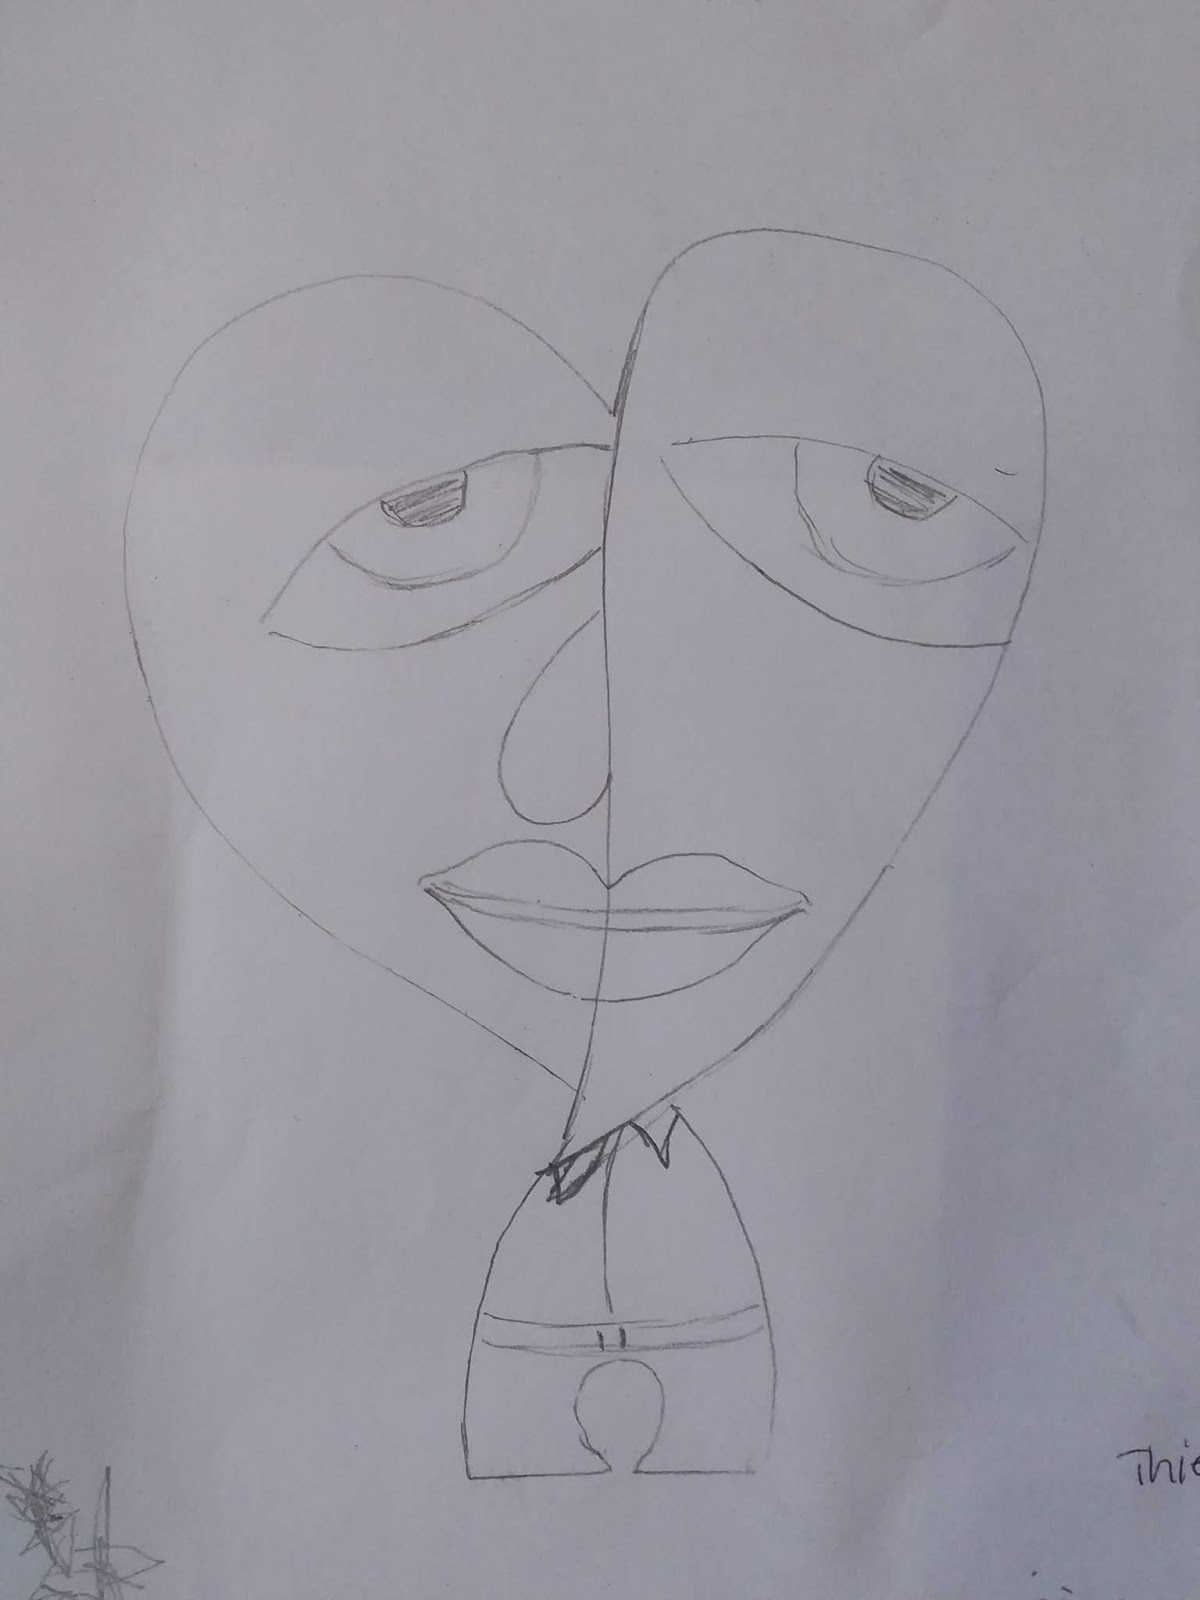
Once you have decided on the design of your art doll. You cut out the main pieces and make a template from the by gluing them down on to some recycled cardboard. So I cut the head in two and the body shape, then cut the eye shape and nose shape as well as the mouth shape.
Having my templates of all the bodily parts, I then traced them on to the Photo Play scrap papers and used double sided tape to hold the cut out pieces together, in the shape of the doll.
Putting my doll to the side for awhile, I then began to work on my journal page background. Using the brayer to spread some paint in green, white and yellow as a base. The background was a little boring, so I added some circles using recycled tape centers and coloured the circles with my finger using some bright red, orange and greens. To finish off the background on my journal page, I went round the circles with a white signo pen and drew a border using a black paint marker.

When I was happy with my journal page background, I put it aside for it to dry and did some detail work on my art doll. I punched some holes around the top of the head to tie in some fibers for the hair, then using the black marker edged around the side of the doll. I also used both black and white marker to put some dot details around its eyes, drew on a belt and glued a heart shaped button on the belt as a buckle.

To make the rosey red lips: This is a rather easy process. I wanted the lips to be as rosey as possible so I used the WOW embossing powder in Primary Red. I drew the lips shape and cut it out of white scrap cardboard. Then pressed the lips in to the Distress Embossing ink and then sprinkled the lips with the Primary Red Embossing powder. Then gave it a blast with my heat tool. I did have to do this process twice to get an even coverage over the lips. I used the dimensional tape to place the lips on the face. They turned out gorgeous, heehee!

Now, it was time to glue my art doll on to my page and did this with a wet glue and double-sided tape for extra strength.

I made a few extra embossed lips and also added them to the bottom of the journal page. My little guy was giving away his kisses! On the left side of my layout I hand wrote, "It Was Only A Kiss" and my journal page art doll was finished.

Below are a few close up pictures of the finished layout.


You can watch the whole process from start to finish below.


Comments
Post a Comment