Gentlemans' Emporium Travelers Notebooks Cover Part 2
Gentlemans' Emporium Travelers Notebooks Cover Part 2
Have you ever really wanted to try making something after watching someone make it? This cover for my Gentlemans' Emporium Notebooks has been on my 'wanting to -do list' for quite some time and I have finally gotten round to making one. It looked so easy to make when watching another person make it, I ummmed...and arghed...thinking it must be harder than it actually looked...Boy! was I wrong.
What I used to Make the Cover:
*Gentlemans' Emporium Patterned paper
* A Laminator and a laminating sleeve
*Scor board
*Trimmer or scissors
*Elastic ( I used black hat elastic)
*Charms of your choosing
*Corner rounder
To start, I chose one of the Gentlemans' Emporium papers that had a wonderful picture on the bottom right hand side, so when I went to fold the cover this image would be on the front of my cover.
I cut the paper to 9 1/4 by 8 1/4 inches, making sure to leave that awesome image on the front. I then rounded the corners.
I then scored the cut paper at 4 inches, 4 1/2 inches (being for the center) and at 5 inches. I folded the scor lines and then turned on my laminating machine to heat up.
I placed my cut cover in between the laminating sleeve and ran it through my laminator.
BE CAREFUL, IT GETS HOT...I have a burnt finger to prove it!...lol lol...
I cut the excess clear acetate off the side and used my scissors to round the corners.
When you have trimmed up the cover, you will need to re-scor your fold lines. This makes it easier to fold the cover in place.
Once I had done that, I grabbed my hole cropodile and punched three holes in the bottom and the top of the spine. One hole gets punched on the center scor line, then one gets punched just to the left of the right hand side scor line and the last one gets punched just to the right of the left handed scor line. This is done to the top and the bottom of the spine.
To hold the notebooks in, I used about black elastic. The elastic is threaded from the bottom on the front side of the cover in the right hand side hole. Then up to the top hole, on the inside of that line: then out and into the top center hole and back down on the inside of cover to the center hole. Then out to the front and back in at the bottom left hand hole and back up to the top. When you have reached the top the end is placed back through the center hole and should be on the inside of the cover. The end of the elastic where you started is thread through the inside hole and this will then be in the center as well. The two ends are then tied together on the inside of the cover.
(I hope that wasn't too confusing but if it was, you may like to watch the process video below to see the threading method).
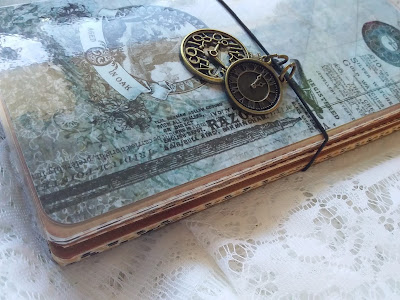
The above picture shows what the outside of the cover will look like after threading the elastic through. The next step is to put a hole in the center of the middle scor line. This hole is used to thread more elastic through and is used as a closure. I cut about 10 inches of black elastic, folded it in half and thread it through the center hole and before knotting it, I placed some clock charms through it as an added embellishment.
After making the cover, the last thing to do was to place the notbooks inside...okay, I surprised myself at how rather easy it all was and it looks wonderful to boot!
Inside front cover...love the stripe pattern from the Gentlemans' Emporium Collection.
View from back...
Inside back...
Finished cover for the Gentlemans' Emporium Travelers Notebooks
The process video can be seen in the video below:
This cover is an awesome way to store the notebooks. And by using the elastic, it's an easy way to remove the notebooks so they can be used individually when desired. I really love making this project and I really hope you 'give it a go'.
Have a great Day!
Wendy xox
Have a great Day!
Wendy xox


Comments
Post a Comment