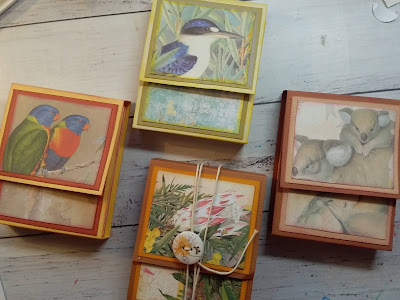
Photo Keepsake Box- I think she was an aussie #2
Photo Keepsake Box
I have really gotten into working in my photo diaries/journals lately
and every time I go to grab a photo, I pick up that boring bluish envelope
they were purchased in and just think to myself...ugggh!! boring!!
So this month I have decide to make my self a very pretty but practical box where I can store my photos...something a bit more 'eye candy' than the purchase envelope.
To make the box shape I started with a 12x12 piece of Kaisercraft cardstock Mustard and cut it down to 11 inches by 9 1/4 inches. I then score that piece at 1 inch and 2 1/2 inches on all sides. Then burnish the folds on all sides. The base of your box will measure 4 1/4 x 6 inches.
I then cut each corner to the shape as shown in the picture below. The outer inch sized flaps will be folded over the sides respectively, to give them a little more strength.
On each of the small flaps (which are used to make the box shape together), I placed some ART GLITTER GLUE and then joined them to the sides of the box, leaving the very top panels on each side up. When I had all the box frame put together, I then paced some more of the glue on the inside of the top flaps and glued them down and let dry. As shown below.
The outer cover (includes the box lid) is very simply a piece of the Couture Creations A Sunburnt Country Collection paper O2A and is cut at 6 1/2 inches by 10 1/2 inches. This piece is then scored at 4 1/2 and at 6 inches.
Then the box frame is glued to the cover at the spine and also on the base.
So how simple is that!!! Quicj easy way to make a box container for all your little treasures.
The only thing left to do is decorate it in an Aussie girlish theme and you are done.
To decorate the top, I used a cut out from the Couture Creations A Sunburnt Country Collection paper of the bird and placed it onto a piece of cardstock from my collection. I then cut some of the decorative labels from Tim Holtz Thinlits Dies and layered them up using some dimensional tape or puffy tape as I like to call it...lol...I also used some of the ephemera from the Couture Creations Sunburnt Country Ephemera pack, mainly the eucalyptus leaves. To add a little more dimension, I colour inked some leaf flourishes from Kaisercraft Aussie Flourish Pack and placed them between the paper leaves and popped on some very small wooden beads from my supplies for faux gumnuts. I placed a smal bow on the top label which is made from the Tim Hotz Paper string pack and for a personal touch I hand wrote the word 'photo' on the smallest layered label. I love the way it turned out..so very aussie countrified...not sure if that is a real word but I'm going with it and useful to boot!!!...lol
As a little more interest on the box, I place a strip of the paper I used as the cover on all sides of the box and then using the word phrases from the bottom strips of the Couture Creation papers...I cut them out and sewed them on to some calico and glued them to the centre of the sides.
The ones I chose were "CHOCK A BLOCK" and "OW YA GOING"...seen below in the pictures.
I left the bottom of the box rather plain but I did add a ephemera piece that simple says..."Made In Australia"
The front panel of my box, I decorated with a small saying "The people who make us Happy" which was also sewn on to calico.
I am so very happy with this simple process keepsake box
and all the beautiful Aussie themed papers and ephemera that I used.
It will be sitting on my table in front of me for when I'm working in my Picture Diaries.
...and I've already started to fill it.
You may like to watch the process video below of making
the box and then showing it fully decorated.
Have a Good Day !!!
Wendy xox


Comments
Post a Comment