Boxed Journal Part 1
Boxed Journal
Part 1
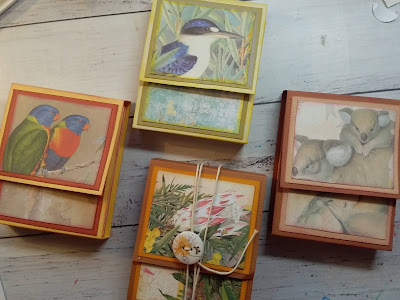
Todays' project is a super cute Aussie themed journal in it's own little 'box'...aka a 'Boxed Journal'.

You need to score and cut your 12x12 paper and so it was easier for you to see the lines I marked, I have used a piece of white 12x12 paper. The paper I actually used was from Couture Creations Sweeping Plains collection Number 6.
Your first set of score lines are at 3 1/2", 4", 8" and * 1/2". Then rotate your paper once and score at 3" and then at 9". As shown below.

Then grab your scissors and cut on the 3 1/2" and 8 1/2" line up to the 3" score mark. Then repeat this step on the other end of your paper...cut on the 3 1/2" and 8 1/2" line up to the 9" score line. As seen below.


Then fold along each score line and your box is ready to fold up and to be decorated. I folded the sides in first and then folded up the center pieces.

That is the base of your box done for your boxed journal. Now, it's time to add a few pockets and tuck spots.
For my box I used the reverse side of 06 from the collection.

I decided to use the Sweeping Plains Number 11 paper that has all the cut aparts on it to make some pockets and tuck spots.

For the front of my box, which is the middle folded panels, I used the 3x4 journal card 'Young & Free' and also the 'G'Day Mate'. I placed it on my panesl so the top can be placed under the bottom part and can be used as a closure.

I also used a die set from Tim Holtz Baroque and cut a few pieces from some cardboard to use to back onto my from focal images and layered the cut aparts on. Also used a bit of music sheet paper and a brad top and bottom for decoration. For the bottom part of the closure I placed two eyelets on either side of the G'Day sign and thread some hemp cord threw each side. Seen above.
The edges of the box were inked with the Rhubard Stalk Memento Luxe Ink. It went really well with the paper.

I made a tuck spot on the bottom middle inside panel and top inside middle I made three seperate pockets. On the top I used a film strip die cut and added some acetate to the back on it and made it into a pocket.
I also used a few of the cut aparts from paper number 11 as decoration.


Below showing the bottom pocket behind closure.

When I finished the middle inside panel, I went to the left hand side and made a pocket with a closure.
Then on the right hand side I added a pocket on the top and bottom fold and also a side tuck spot in the center.
Below you can see the right hand inside panel.

The very center of the box is where I will be placing a small journal. You will be able to see the making of this in part 2 ...coming up soon!
I have a full length process video that you may like to watch, showing part 1 of my process and how I have made each of the pockets and tuck spots.
Pop back and see how I make the journal for the inside middle panel.
Don't forget to check out Aunty Vera Scrap and Craft to see all the great discounted items from everyone for the month of September.
Have a Great Day !
Wendy xox


Comments
Post a Comment