Boxed Journal Part 2
Boxed Journal
Part 2
In this part, I will show you how I made the small journal for the center panel of the box.
The cover of the journal will measure 4" by 6" and will fit perfectly on the inside middle panel.

For the cover of my journal I used number 12 from the Couture Creations Sweeping Plains collection. I cut the Kookaburra and wild flower panel out as one piece and folded it so those two images were on the inside cover. I also had a piece of burlap so I cut it to size, glued it to the front of the cover and on tthe top of that I place another image from No. 12 with the Aussie flag showing. I used a piece of seam binding as a tie closure on the journal which was glued under the burlap.

I used a corner rounder and rounded all the corners on the cover and also on each individual page in the journal. I collected roughly twenty random pages to use for my journaling pages. I cut them at roughly 5 3/4' in length and the width at 3 3/4". I gathered my pages together and then stitched them into the cover. I used a three hole pamphlet stitch to attach the papers to the cover.
Showing a couple of the papers I used for the journal.

Kookaburra showing on inside front cover.

Below, showing some of the coffee dyed papers and recycled old typing exercise paper.

Back inside cover of journal below.


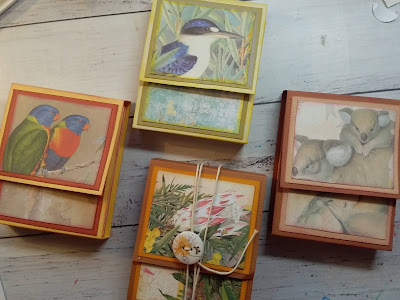
Besides making the journal for box, I also decorated some more of the panels on the box.
You can view part 2 below in the video, which will give you a more detailed process.
Have a Great Day Guys!
Wendy xox


Comments
Post a Comment